使用Docker搭建Jenkins+python3+selenium\helium项目
项目背景
用python3在本地写了一个项目,这个项目采用helium+selenium+chrome进行界面操作,代码放在gitee上托管。现在基本功能已经实现,想在linux服务器上部署项目代码,实现自动构建。
- 自动构建解决方案
- 自动构建工具选型:jenkins
- 中间件选型:docker
- 代码运行环境:python3
- 脚本运行工具:chrome浏览器、chromedriver、helium库
Ⅰ、安装docker
- linux系统中安装docker
curl -fsSL https://get.docker.com | bash -s docker --mirror Aliyun
- docker镜像国内加速
vim /etc/docker/daemon.json

{
"registry-mirrors": [
"https://registry.docker-cn.com",
"http://hub-mirror.c.163.com",
"https://docker.mirrors.ustc.edu.cn"
]
}

# 重启服务
systemctl daemon-reload
systemctl restart docker
Ⅱ、安装jenkins
- 在linux上任意路径,创建一个用于存放Jenkins文件的文件夹 "jenkins_py"
mkdir jenkins_py
docker run -itd --name=jenkins_py -p 8989:8080 -p 50001:50000 -v $PWD:/var/jenkins_home --privileged=true -u root jenkins/jenkins
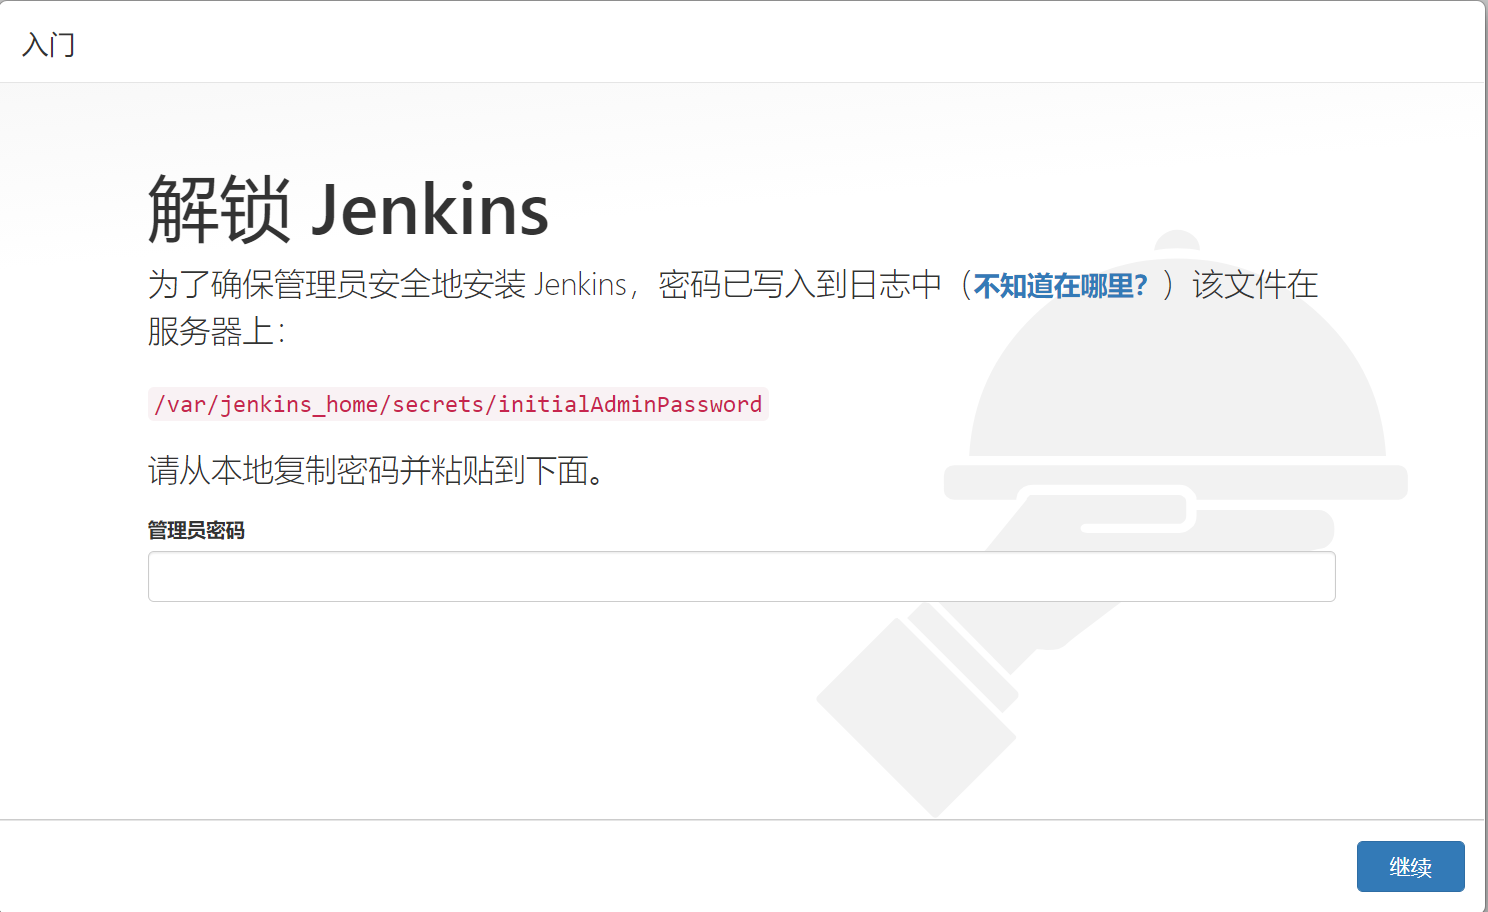
- 访问jenkins:http://ip:8989
-
出现输入密码页面时,获取密码:
- 方法1:
# 进入容器 docker exec -it -u root jenkins_py /bin/bash # 查看密码 cat /var/jenkins_home/secrets/initialAdminPassword- 方法2:
# 在当前宿主linux机器上,进入前面自己创建的jenkins_py文件夹
cd secrets
cat initialAdminPassword
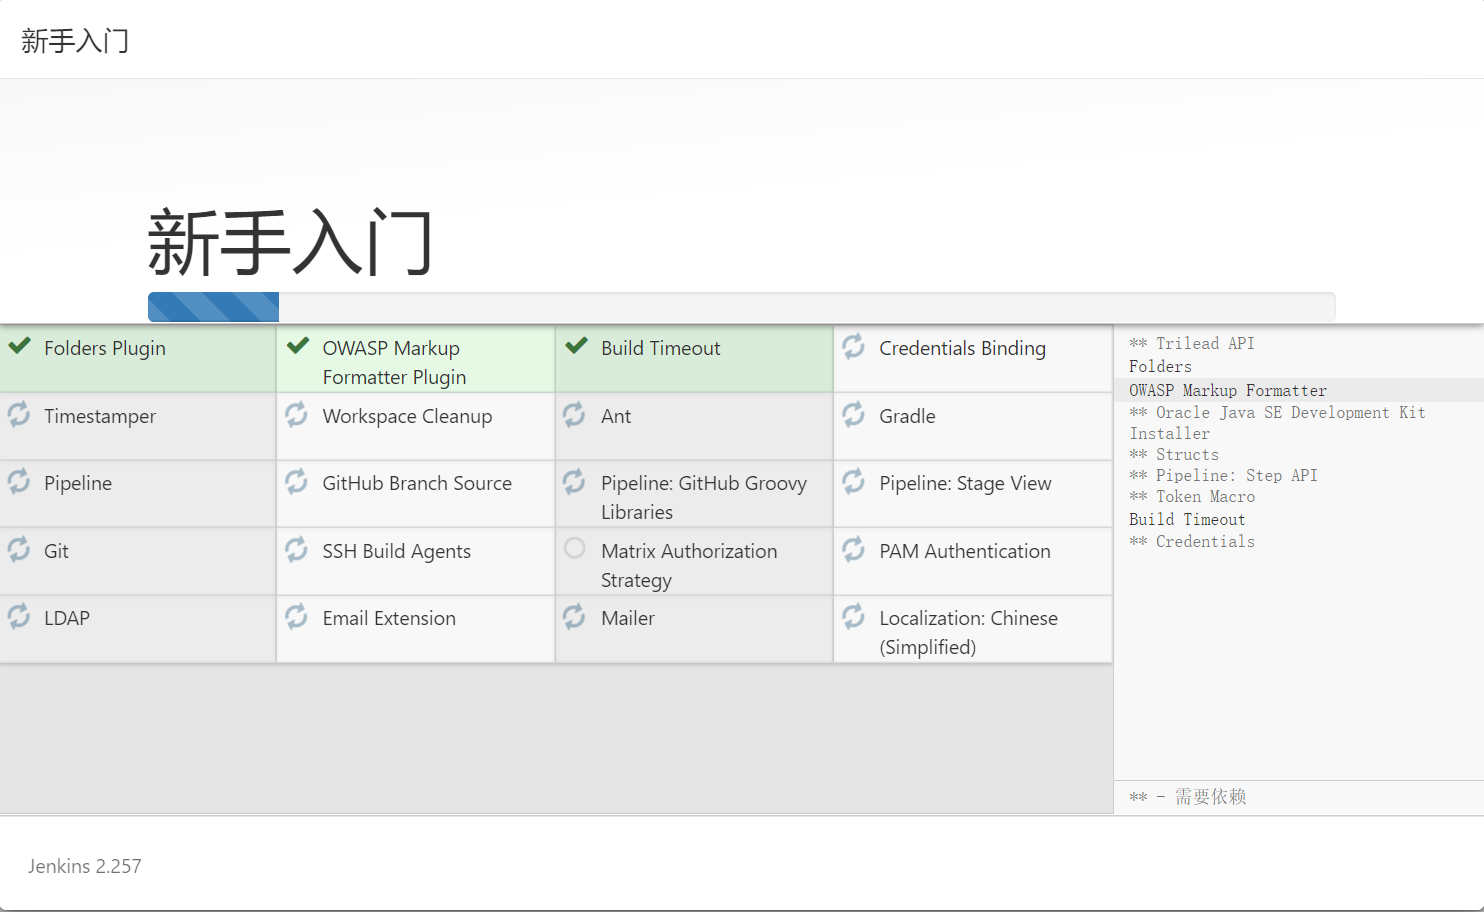
复制密码,填入web页面的密码框,在选择安装插件页面,点击安装推荐插件,等待插件自动安装
Ⅲ、容器安装必要软件
- 进入容器
docker exec -it -u root jenkins_py /bin/bash
- 安装更新
# 安装更新
apt-get update

# 查看系统
cat /etc/issue

# 此时容器默认的系统为 debain 9
# debain默认的软件源非常慢, 可以更换为国内阿里源

# 安装vim
apt-get install -y vim
apt-get install -y wget

# 更换源为阿里源
vim /etc/apt/sources.list

deb http://mirrors.aliyun.com/debian/ stretch main non-free contrib
deb-src http://mirrors.aliyun.com/debian/ stretch main non-free contrib
deb http://mirrors.aliyun.com/debian-security stretch/updates main
deb-src http://mirrors.aliyun.com/debian-security stretch/updates main
deb http://mirrors.aliyun.com/debian/ stretch-updates main non-free contrib
deb-src http://mirrors.aliyun.com/debian/ stretch-updates main non-free contrib
deb http://mirrors.aliyun.com/debian/ stretch-backports main non-free contrib
deb-src http://mirrors.aliyun.com/debian/ stretch-backports main non-free contrib

# 更新系统
apt-get update

# 安装libssl-dev
apt-get install libssl-dev
Ⅳ、配置web自动化环境
- 下载浏览器
- 百度搜索"chrome for linux", 下载适合debain版本的chrome浏览器
- 把下载的文件上传到linux机器
- 下载浏览器驱动
- 下载chrome浏览器linux对应版本的驱动
- 把下载的文件上传到linux机器
- Jenkins容器中,安装chrome浏览器
# 把chrome文件,复制到上面创建的 jenkins_py 文件夹
cp google-chrome-stable_current_amd64_85.0.4183.102.deb ./jenkins_py/

# 进入容器
docker exec -it -u root jenkins_py /bin/bash

cd /var/jenkins_home
chmod +x google-chrome-stable_current_amd64_85.0.4183.102.deb
dpkg -i google-chrome-stable_current_amd64_85.0.4183.102.deb

- 配置浏览器驱动
# 解压驱动zip包
unzip chromedriver_linux64.zip

# 拷贝到 jenkins_py文件夹
cp chromedriver ./jenkins_py/

# 进入容器
docker exec -it -u root jenkins_py /bin/bash

cd /var/jenkins_home
chmod +x chromedriver
mv chromedriver /usr/bin/
cp /usr/bin/chromedriver /usr/local/bin/
Ⅴ、安装python3
- 安装python3
apt-get install -y python3
- 安装pip
# 下载pip
wget https://bootstrap.pypa.io/get-pip.py

python3 get-pip.py

pip3 install --upgrade --force-reinstall setuptools
- 修改系统默认python版本为python3
cd /usr/bin
ls -l python*
# 查看上面的python3的版本

rm -rf python
ln -s python3.5 pythonpython3.5
# 修改为上面对于的python3版本* 修改pip源
- 修改pip源
vim  /etc/pip.conf
[global]
trusted-host = mirrors.aliyun.com
index-url = http://mirrors.aliyun.com/pypi/simple/
Ⅵ、jenkins 配置任务
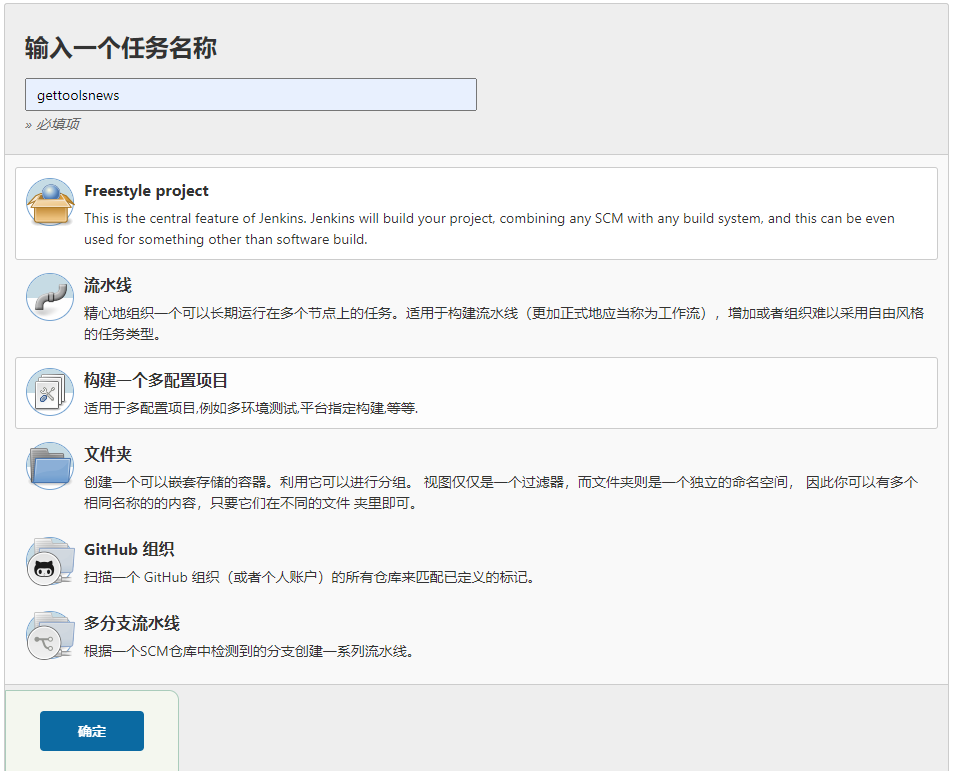
- 创建任务
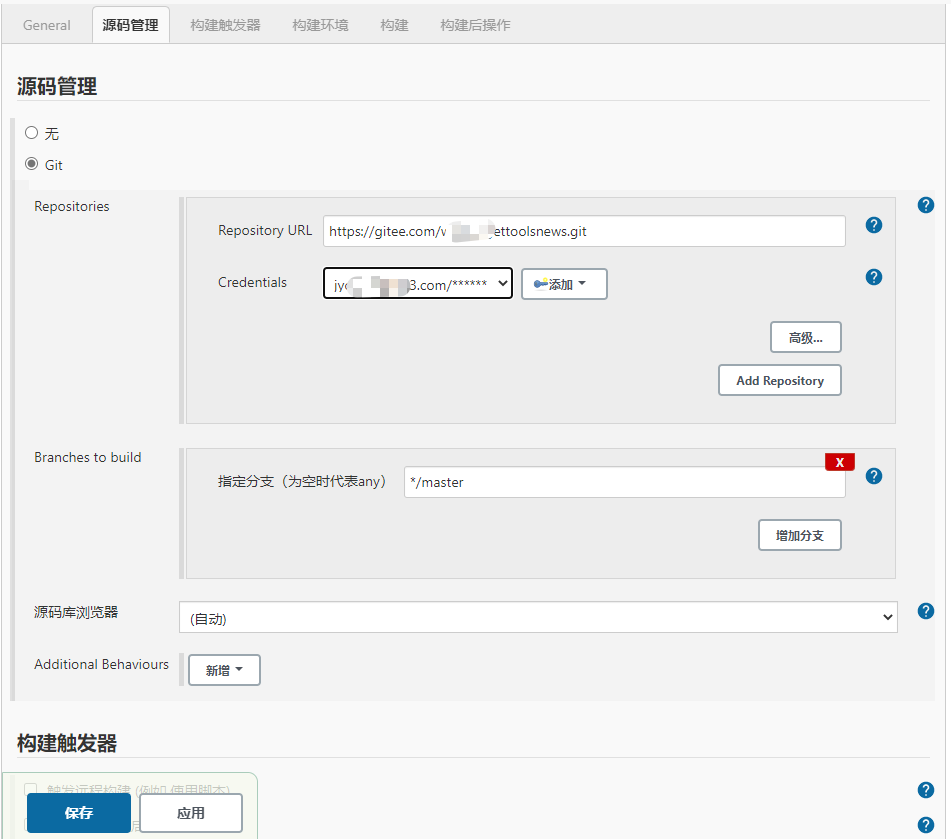
- 配置git
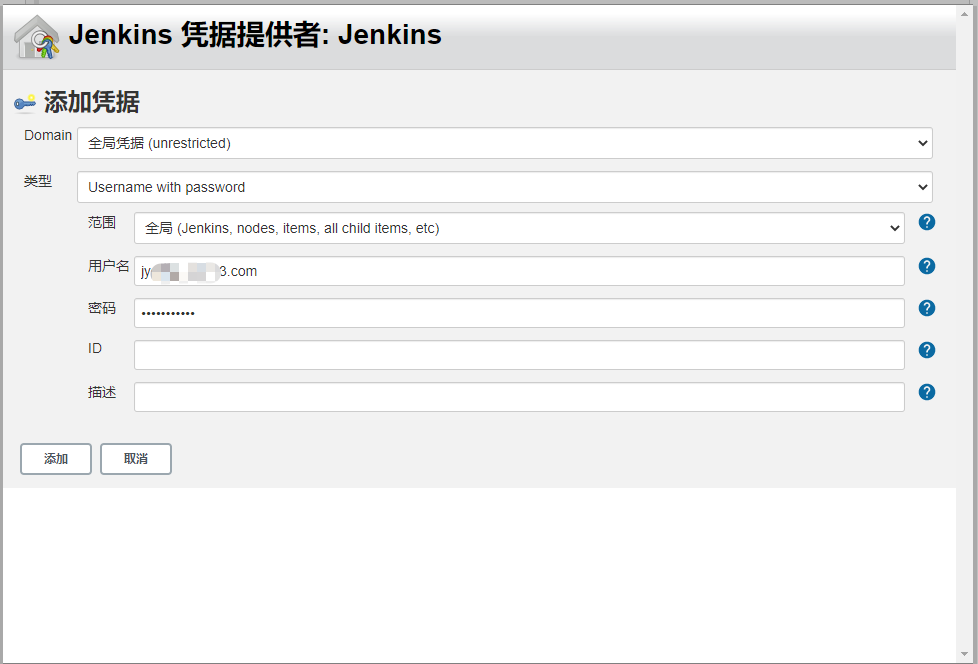
- 配置构建触发器(可选)
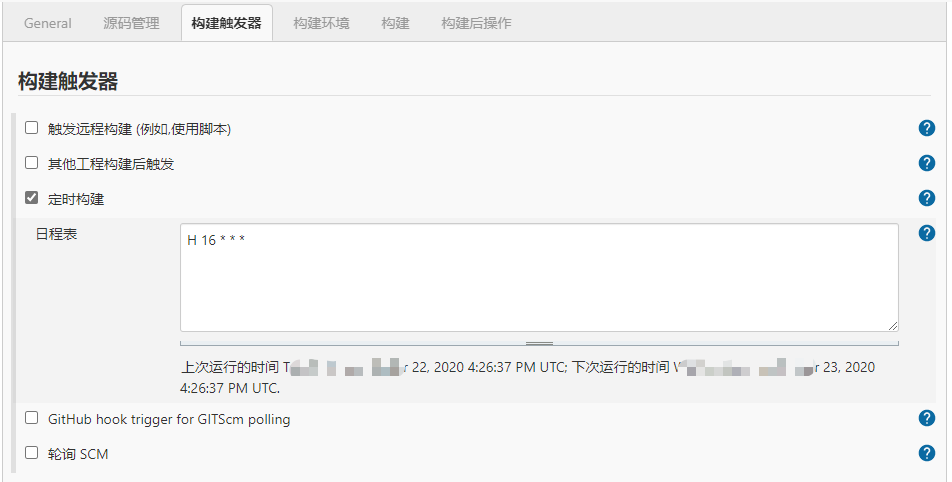
- 配置构建脚本
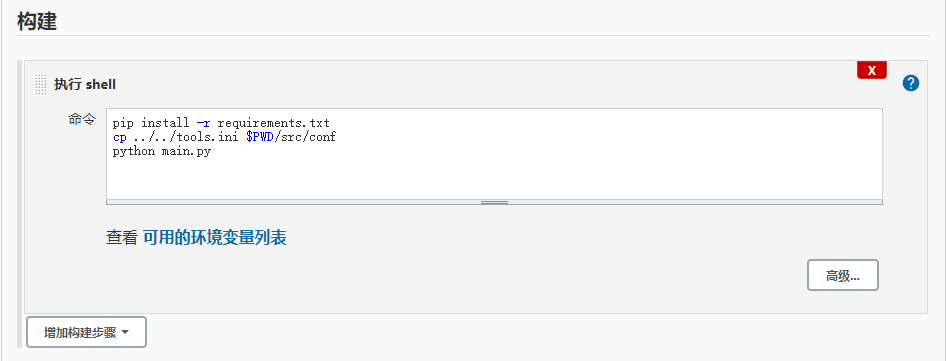
pip install -r requirements.txt 执行项目根目录中的requirements.txt文件,自动安装项目需要的库,这样就不用担心代码引入了新库,而Jenkins中不存在,导致报错了。
cp ../../tools.ini $PWD/src/conf 拷贝配置文件。因为gitee托管项目时,没有提交ini带私密信息的配置文件
python main.py 用python执行项目
- 构建
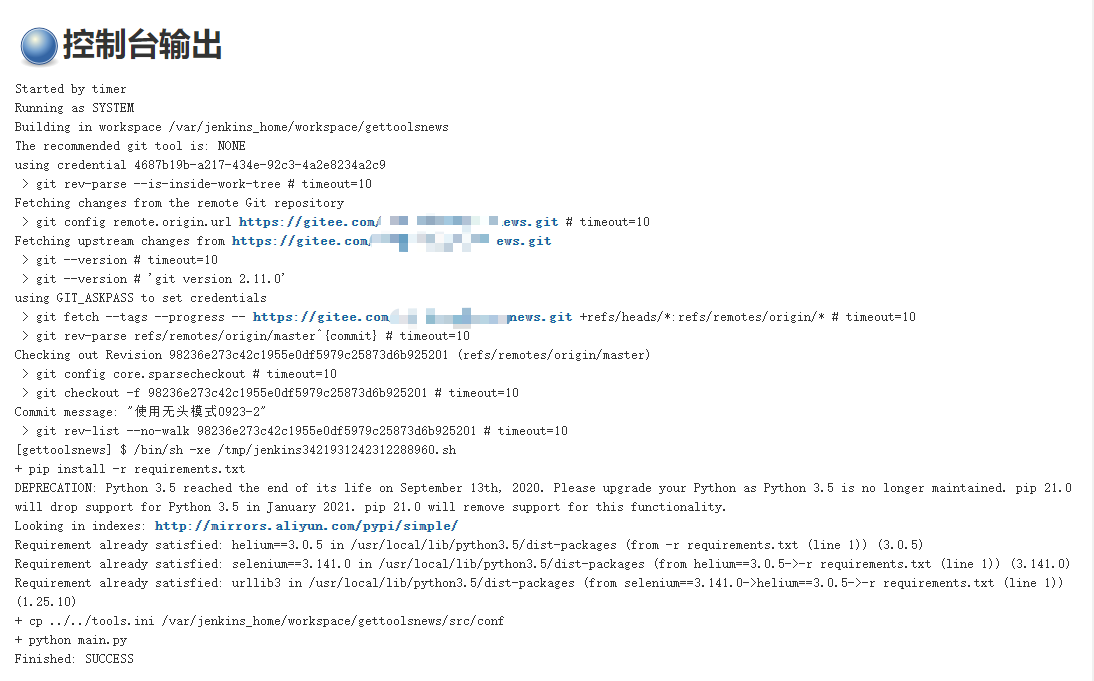
注意: 用docker+jenkins来运行selenium的项目,是无图形界面的,所以项目中,浏览器必须采用无头模式
# 参考代码
self.options = ChromeOptions()
self.options.add_argument('--headless')
self.options.add_argument('--no-sandbox')
self.options.add_argument('--disable-gpu')
self.options.add_argument('--disable-dev-shm-usage')
start_chrome(headless=True,options=self.options)
好了,项目构建成功。整个构建步骤、方法,你学会了吗?
欢迎来到testingpai.com!
注册 关于