用ngrinder的做性能测试,它是可以自动生成groovy语言脚本。而groovy这门语言,其实是Java语言的一种衍生版本,如果你懂得用Java语言来写单元测试的脚本进行读写文件,那么用groovy语言再来写一个读写文件的脚本,其实就比较简单。
因为考虑到有的同学完全没有用过ngrinder的写groovy语言的脚本,所以呢,我们在开始的时候还是用ngrinder的来生成一个groovy脚本作为基础。
我们可以在登录之后,点击顶部菜单【脚本】,然后创建脚本,在弹出窗中选择groovy,输入请求地址,创建脚本。
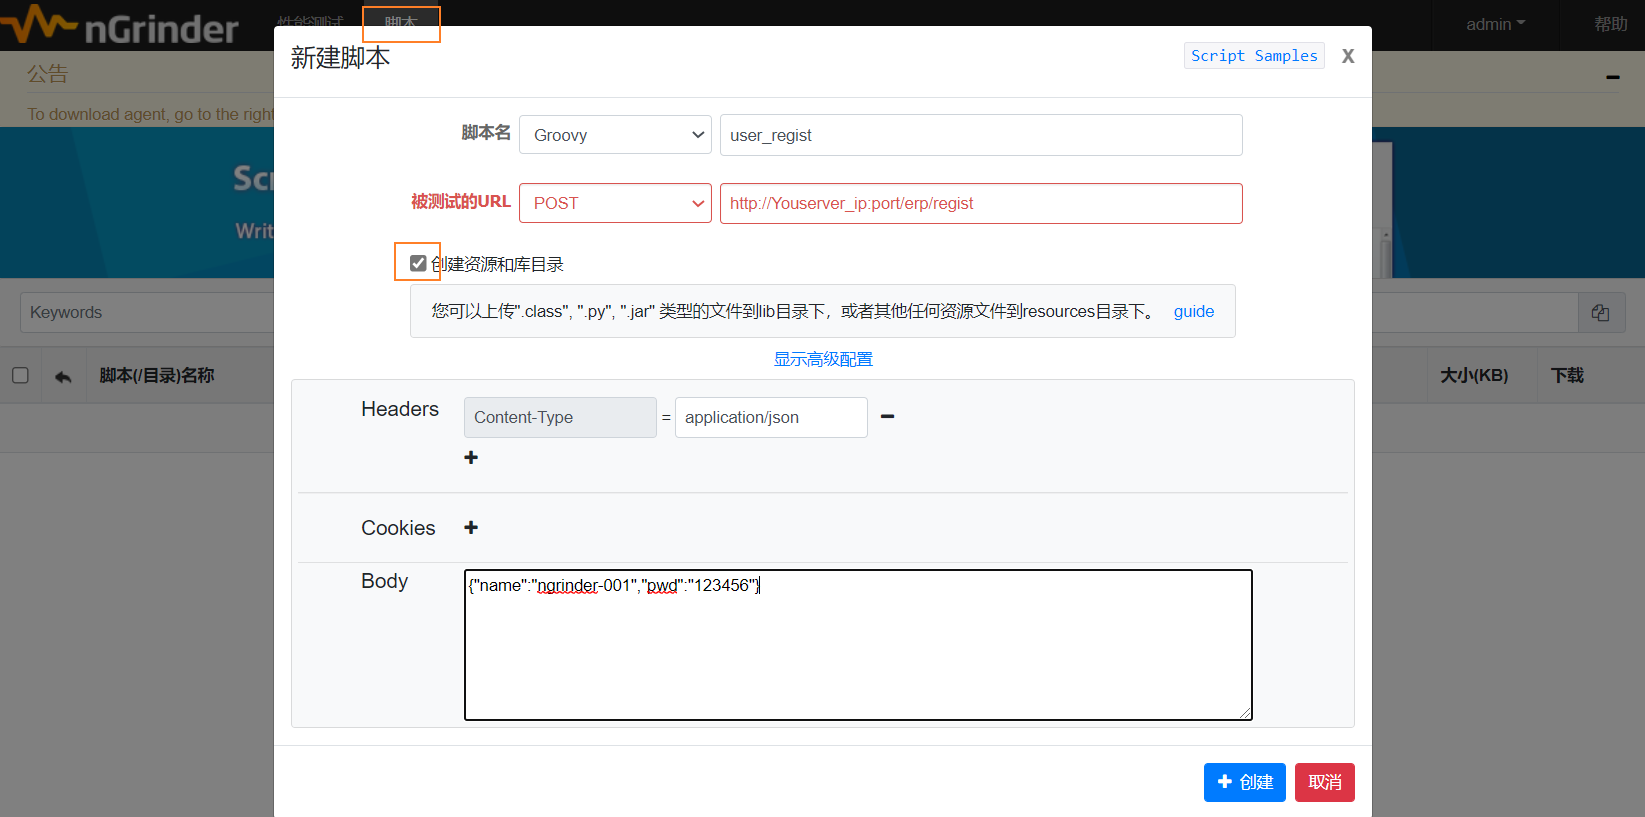
生成如下脚本:
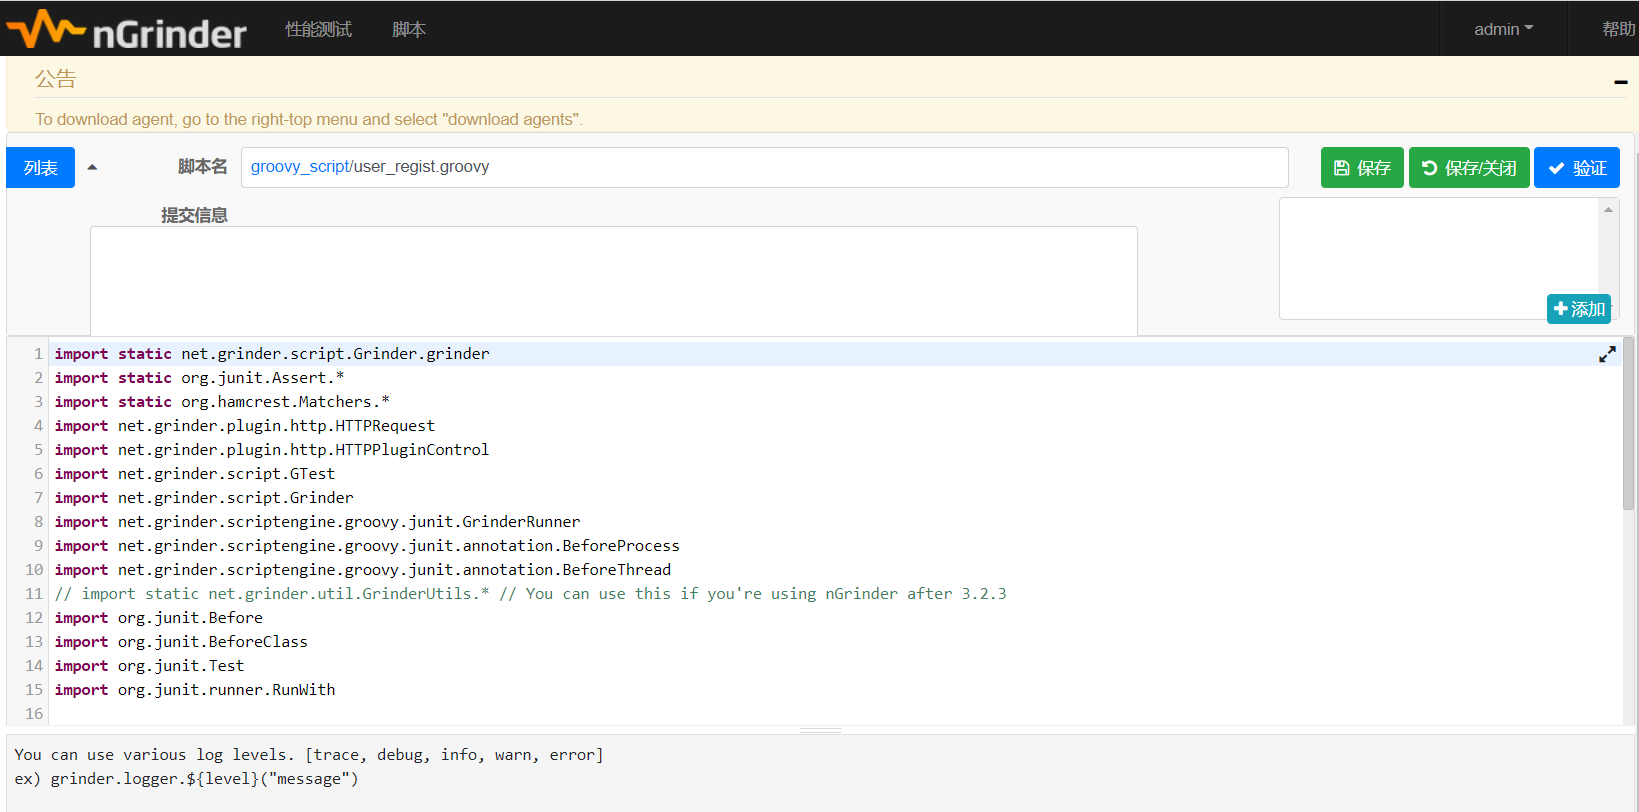
import static net.grinder.script.Grinder.grinder
import static org.junit.Assert.*
import static org.hamcrest.Matchers.*
import net.grinder.plugin.http.HTTPRequest
import net.grinder.plugin.http.HTTPPluginControl
import net.grinder.script.GTest
import net.grinder.script.Grinder
import net.grinder.scriptengine.groovy.junit.GrinderRunner
import net.grinder.scriptengine.groovy.junit.annotation.BeforeProcess
import net.grinder.scriptengine.groovy.junit.annotation.BeforeThread
// import static net.grinder.util.GrinderUtils.* // You can use this if you're using nGrinder after 3.2.3
import org.junit.Before
import org.junit.BeforeClass
import org.junit.Test
import org.junit.runner.RunWith

import java.util.Date
import java.util.List
import java.util.ArrayList

import HTTPClient.Cookie
import HTTPClient.CookieModule
import HTTPClient.HTTPResponse
import HTTPClient.NVPair

/**
 * A simple example using the HTTP plugin that shows the retrieval of a
 * single page via HTTP.
 *
 * This script is automatically generated by ngrinder.
 *
 * @author admin
 */
@RunWith(GrinderRunner)
class TestRunner {

	public static GTest test
	public static HTTPRequest request
	public static NVPair[] headers = []
	public static String body = "{\"name\":\"ngrinder-001\",\"pwd\":\"123456\"}"
	public static Cookie[] cookies = []

	@BeforeProcess
	public static void beforeProcess() {
		HTTPPluginControl.getConnectionDefaults().timeout = 6000
		test = new GTest(1, "Youserver_IP")
		request = new HTTPRequest()
		// Set header datas
		List<NVPair> headerList = new ArrayList<>()
		headerList.add(new NVPair("Content-Type", "application/json"))
		headers = headerList.toArray()
		grinder.logger.info("before process.");
	}

	@BeforeThread
	public void beforeThread() {
		test.record(this, "test")
		grinder.statistics.delayReports=true;
		grinder.logger.info("before thread.");
	}

	@Before
	public void before() {
		request.setHeaders(headers)
		cookies.each { CookieModule.addCookie(it, HTTPPluginControl.getThreadHTTPClientContext()) }
		grinder.logger.info("before. init headers and cookies");
	}

	@Test
	public void test(){
		HTTPResponse result = request.POST("http://Yousever_IP:port/erp/regist", body.getBytes())

		if (result.statusCode == 301 || result.statusCode == 302) {
			grinder.logger.warn("Warning. The response may not be correct. The response code was {}.", result.statusCode);
		} else {
			assertThat(result.statusCode, is(200));
		}
	}
}
从这个脚本中,我们有看到我们有注册的账号,如果你重复注册同一个账号,那么肯定不能成功注册。我们可能就会想着准备一份测试数据,从这个数据中读取账号来进行注册。
我们准备一份txt文件,在这个文件中我们用逗号分割列,创建一批账号。
ngrinder-r001,123456
ngrinder-r002,123456
ngrinder-r003,123456
ngrinder-r004,123456
ngrinder-r005,123456
ngrinder-r006,123456
ngrinder-r007,123456
然后,在脚本的resources文件夹中,点击【上传】按钮,上传这个txt文件

好了,现在万事俱备,只欠东风,开始修改我们的脚本了。
在脚本中“@BeforeProcess”前面添加一句 public static List<String> readfile = new File("./resources/registuser.txt").readLines("utf8") 定义一个readfile对象接收读取txt文件。
下面我们就再定义一个变量user来接收咱们的文件中的值 public static String user,再在“@Before”中,给user赋值 user = readfile[0].split(",")[0],再把body重新赋值一下 body = "{\"name\":\"${user}\",\"pwd\":\"123456\"}"
修改后,脚本如下:
import static net.grinder.script.Grinder.grinder
import static org.junit.Assert.*
import static org.hamcrest.Matchers.*
import net.grinder.plugin.http.HTTPRequest
import net.grinder.plugin.http.HTTPPluginControl
import net.grinder.script.GTest
import net.grinder.script.Grinder
import net.grinder.scriptengine.groovy.junit.GrinderRunner
import net.grinder.scriptengine.groovy.junit.annotation.BeforeProcess
import net.grinder.scriptengine.groovy.junit.annotation.BeforeThread
// import static net.grinder.util.GrinderUtils.* // You can use this if you're using nGrinder after 3.2.3
import org.junit.Before
import org.junit.BeforeClass
import org.junit.Test
import org.junit.runner.RunWith

import java.util.Date
import java.util.List
import java.util.ArrayList

import HTTPClient.Cookie
import HTTPClient.CookieModule
import HTTPClient.HTTPResponse
import HTTPClient.NVPair

/**
 * A simple example using the HTTP plugin that shows the retrieval of a
 * single page via HTTP.
 *
 * This script is automatically generated by ngrinder.
 *
 * @author admin
 */
@RunWith(GrinderRunner)
class TestRunner {

	public static GTest test
	public static HTTPRequest request
	public static NVPair[] headers = []
	public static String body
	public static Cookie[] cookies = []
	public static String user
	public static List<String> readfile = new File("./resources/registuser.txt").readLines("utf8")

	@BeforeProcess
	public static void beforeProcess() {
		HTTPPluginControl.getConnectionDefaults().timeout = 6000
		test = new GTest(1, "Yousever_IP")
		request = new HTTPRequest()
		// Set header datas
		List<NVPair> headerList = new ArrayList<>()
		headerList.add(new NVPair("Content-Type", "application/json"))
		headers = headerList.toArray()
		grinder.logger.info("before process.");
	}

	@BeforeThread
	public void beforeThread() {
		test.record(this, "test")
		grinder.statistics.delayReports=true;
		grinder.logger.info("before thread.");
	}

	@Before
	public void before() {
		request.setHeaders(headers)
		cookies.each { CookieModule.addCookie(it, HTTPPluginControl.getThreadHTTPClientContext()) }
		user = readfile[0].split(",")[0]
		grinder.logger.info("====User_name is {}", user)
		body = "{\"name\":\"${user}\",\"pwd\":\"123456\"}"
		grinder.logger.info("before. init headers and cookies");
	}

	@Test
	public void test(){
		HTTPResponse result = request.POST("http://Yousever_IP:port/erp/regist", body.getBytes())

		if (result.statusCode == 301 || result.statusCode == 302) {
			grinder.logger.warn("Warning. The response may not be correct. The response code was {}.", result.statusCode);
		} else {
			assertThat(result.statusCode, is(200));
		}
	}
}
然后点击页面中的验证按钮验证脚本是否有问题?如果验证信信息中显示正常,那就说明你的脚步没有问题。
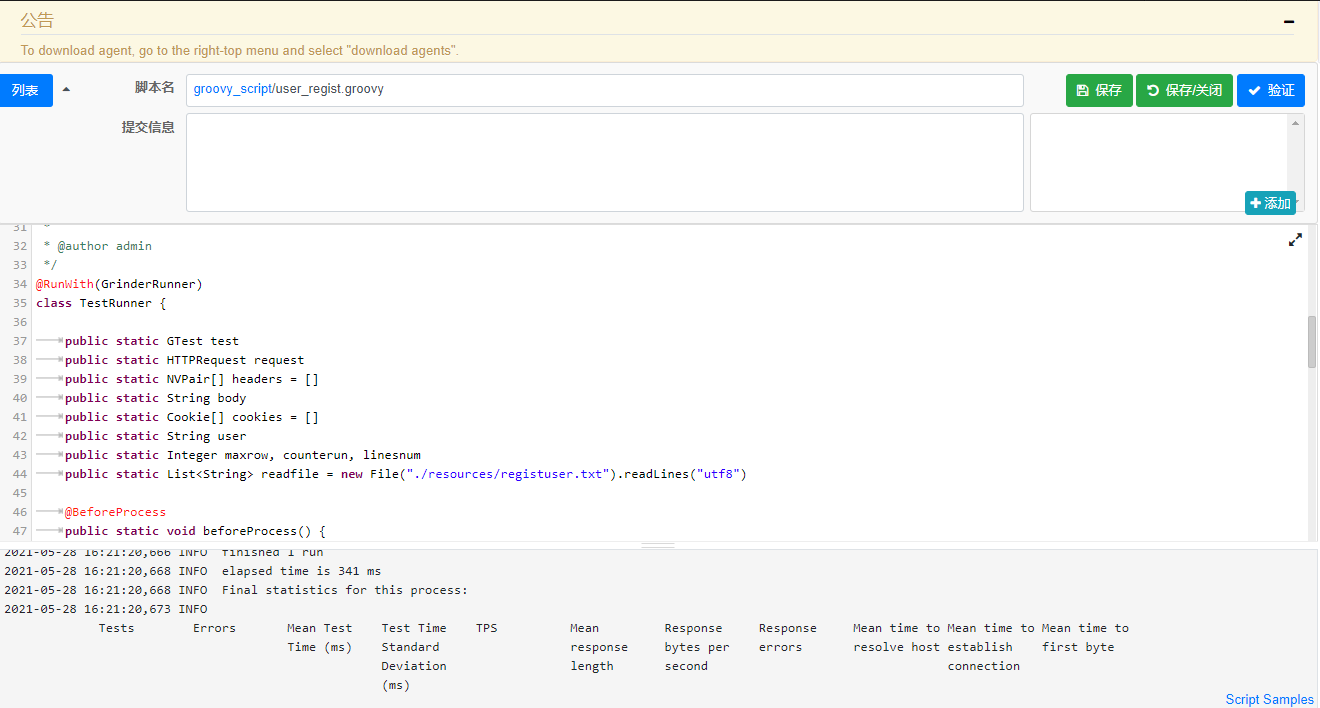
现在我们已经实现了从用脚本读取文件中的数据作为传入参数的值。
可能你又会不满足了,你说这个脚本现在只能拿到第1个值,我想在做性能测试过程中,循环的去获取我的文本中的值,怎么办呢?
那么首先我们肯定要想着要定义什么变量,一个是我们的最大行数,第2个是我们运行的次数,第3个就是真正取得第几行值 public static Integer maxrow, counterun, linesnum 然后,在“@BeforeProcess”中添加 maxrow = readfile.size() 获取文件最大行数,在“@Before” 中添加 counterun = grinder.runNumber 获取运行次数,接下来就是做一个逻辑判断,当运行次数超过最大行数时,我们又要从第一行,开始取值。
参考脚本如下:
import static net.grinder.script.Grinder.grinder
import static org.junit.Assert.*
import static org.hamcrest.Matchers.*
import net.grinder.plugin.http.HTTPRequest
import net.grinder.plugin.http.HTTPPluginControl
import net.grinder.script.GTest
import net.grinder.script.Grinder
import net.grinder.scriptengine.groovy.junit.GrinderRunner
import net.grinder.scriptengine.groovy.junit.annotation.BeforeProcess
import net.grinder.scriptengine.groovy.junit.annotation.BeforeThread
// import static net.grinder.util.GrinderUtils.* // You can use this if you're using nGrinder after 3.2.3
import org.junit.Before
import org.junit.BeforeClass
import org.junit.Test
import org.junit.runner.RunWith

import java.util.Date
import java.util.List
import java.util.ArrayList

import HTTPClient.Cookie
import HTTPClient.CookieModule
import HTTPClient.HTTPResponse
import HTTPClient.NVPair

/**
 * A simple example using the HTTP plugin that shows the retrieval of a
 * single page via HTTP.
 *
 * This script is automatically generated by ngrinder.
 *
 * @author admin
 */
@RunWith(GrinderRunner)
class TestRunner {

	public static GTest test
	public static HTTPRequest request
	public static NVPair[] headers = []
	public static String body
	public static Cookie[] cookies = []
	public static String user
	public static Integer maxrow, counterun, linesnum	// 定义最大行数,运行的次数,取文档中行数
	// 读取文件
	public static List<String> readfile = new File("./resources/registuser.txt").readLines("utf8")

	@BeforeProcess
	public static void beforeProcess() {
		HTTPPluginControl.getConnectionDefaults().timeout = 6000
		test = new GTest(1, "Yousever_IP")
		maxrow = readfile.size()	// 获取文件 最大行数
		request = new HTTPRequest()
		// Set header datas
		List<NVPair> headerList = new ArrayList<>()
		headerList.add(new NVPair("Content-Type", "application/json"))
		headers = headerList.toArray()
		grinder.logger.info("before process.");
	}

	@BeforeThread
	public void beforeThread() {
		test.record(this, "test")
		grinder.statistics.delayReports=true;
		grinder.logger.info("before thread.");
	}

	@Before
	public void before() {
		request.setHeaders(headers)
		cookies.each { CookieModule.addCookie(it, HTTPPluginControl.getThreadHTTPClientContext()) }
		counterun = grinder.runNumber	// 获取运行次数
		grinder.logger.info("=======counterun is : {}", counterun)
		// 逻辑判断,取值
		if (counterun < maxrow) {
			linesnum = counterun
		}else {
			linesnum = counterun % maxrow
		}
		grinder.logger.info("=======linesnum is : {}", linesnum)
		user = readfile[linesnum].split(",")[0]
		grinder.logger.info("=========User_name is {}", user)
		body = "{\"name\":\"${user}\",\"pwd\":\"123456\"}"
		grinder.logger.info("before. init headers and cookies");
	}

	@Test
	public void test(){
		HTTPResponse result = request.POST("http://Yousever_IP:port/erp/regist", body.getBytes())

		if (result.statusCode == 301 || result.statusCode == 302) {
			grinder.logger.warn("Warning. The response may not be correct. The response code was {}.", result.statusCode);
		} else {
			assertThat(result.statusCode, is(200));
		}
	}
}
脚本已经写好了,那么接下来我们就去设置场景来run一下吧。
点击顶部菜单【性能测试】,然后点击【创建测试】,随意设置一个‘虚拟用户数’,填写好自己的‘目标主机’IP地址,自己设定一个‘测试时间’,点击【保存并运行】,即可开始运行场景。
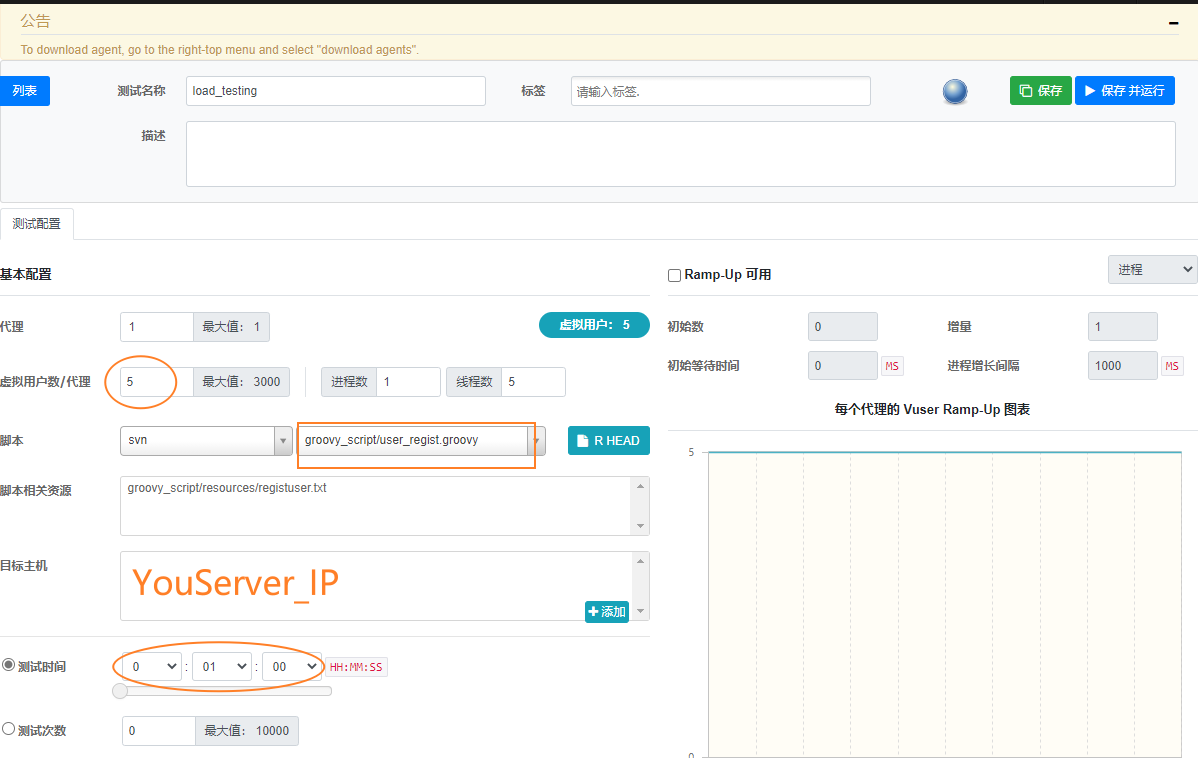
运行结束后点击日志,可以去查看运行过程中的日志。
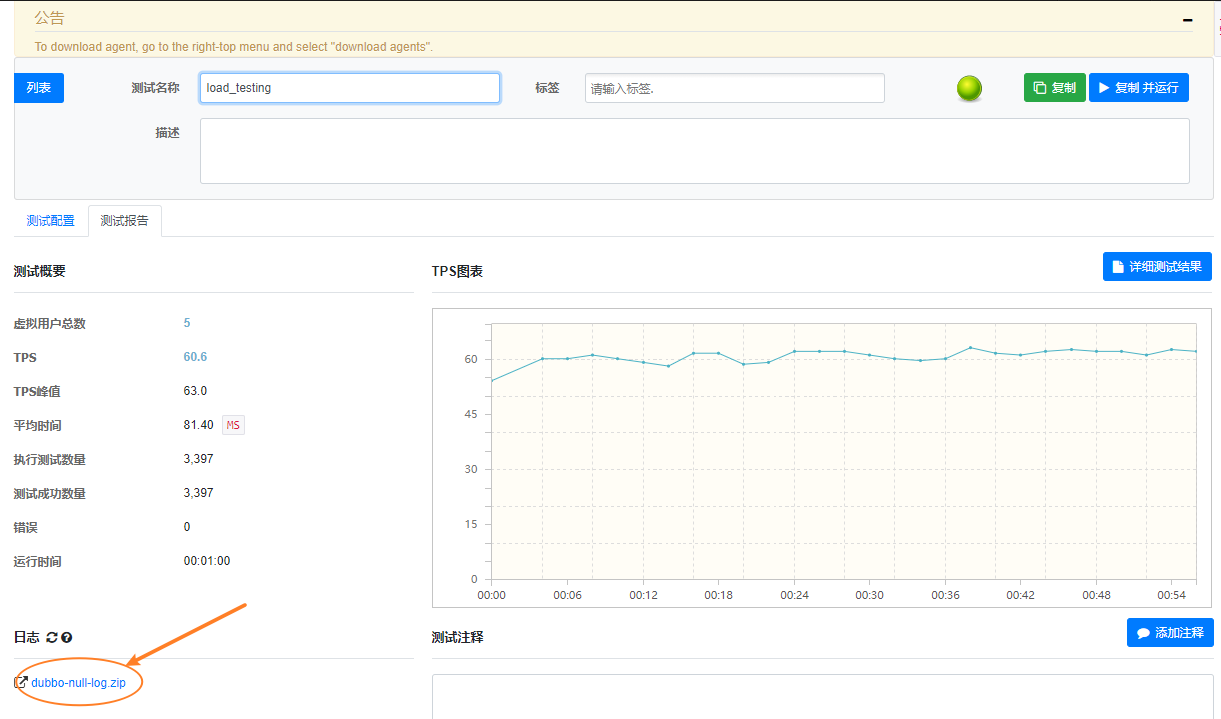

好了,至此我们用ngrinder的来读取文件,并循环使用文件中的数据进行性能测试的脚本,已经讲解完了,你掌握了吗?
欢迎来到testingpai.com!
注册 关于